 Animal Rigger Pro
2. Mark
Click the joints on your animal. One list, one joint at a time, and the viewport beside it.
Marks are the only thing you place by hand. Every control, bone and pivot of the rig is worked out from them.
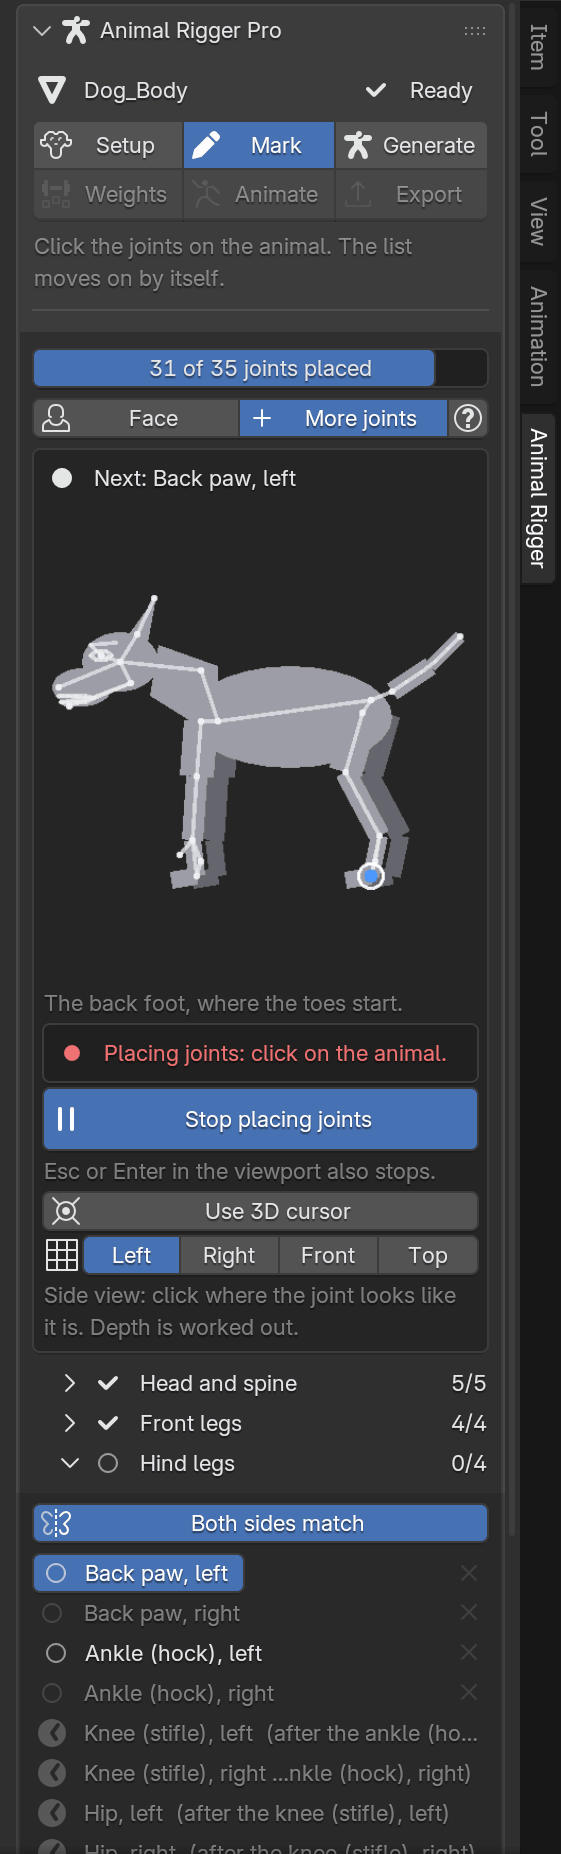
The page, from the top
- The progress bar counts the joints placed.
- Face and More joints add optional groups to the list: the face, the tail, the dewclaws. The ? button opens the anatomy guide, with pictures of the knee, ankle, shoulder blade and pastern.
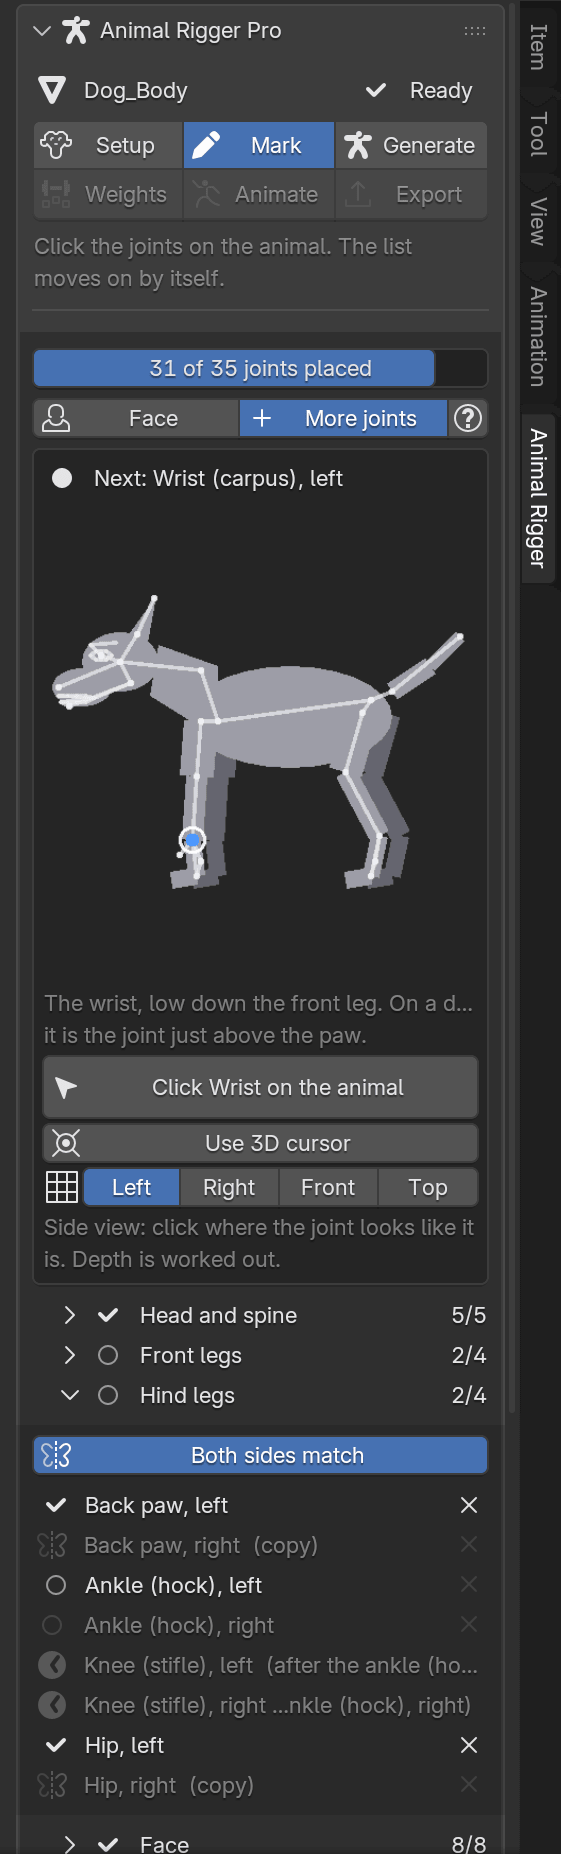
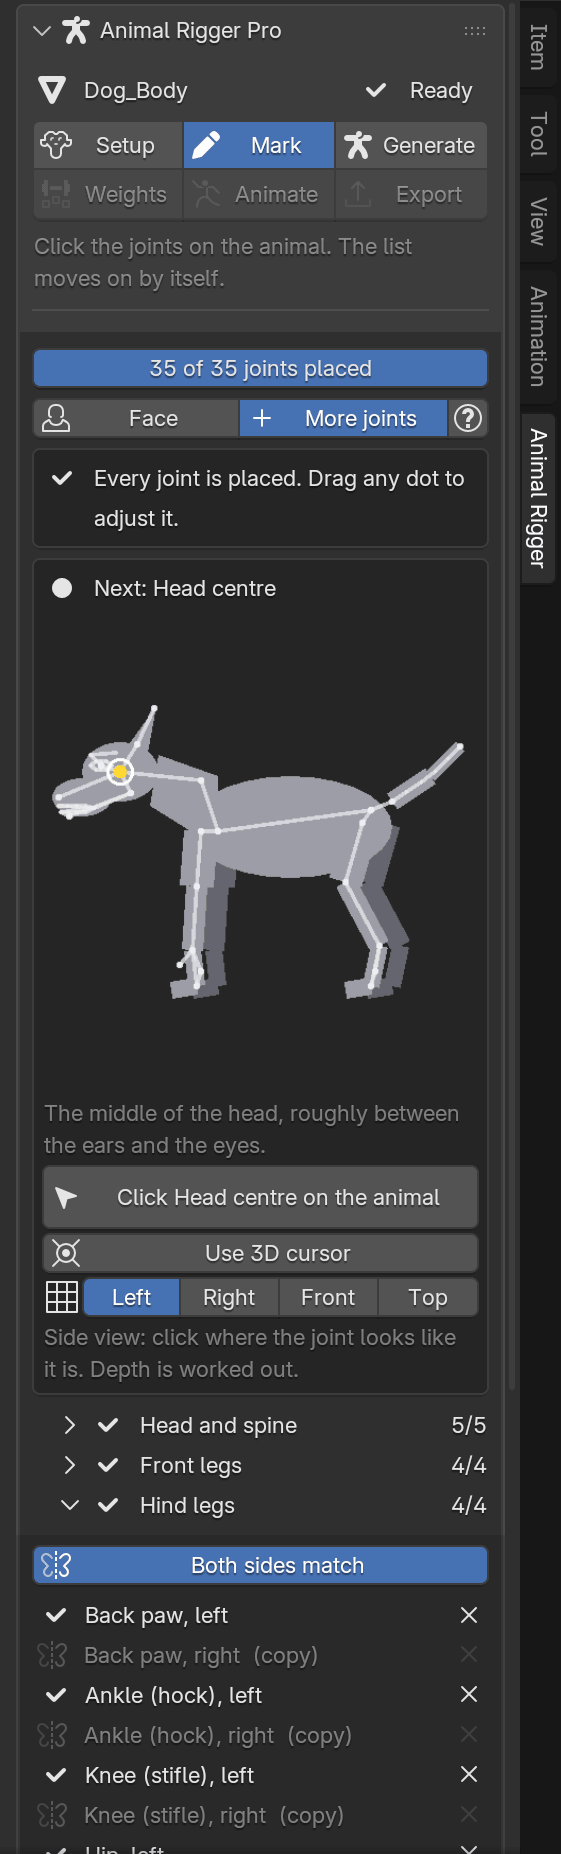
- The card says which joint is next, shows it lit on a small picture of an animal, and says in plain words where it is. For a face joint the picture is a close-up of the head.
- Click … on the animal starts the click tool. While it runs, the card says Placing joints and the button stops it.
- Use 3D cursor puts the joint where the 3D cursor is, for a spot you placed exactly some other way.
- Left, Right, Front, Top turn the view square on to the animal. These are named for the animal, so Left shows the animal's left side whichever way it faces.
- The list holds every joint, in groups. Click any row to make it the next one; the X beside it empties it.
How to click
Press Left. Most joints are marked from the side.
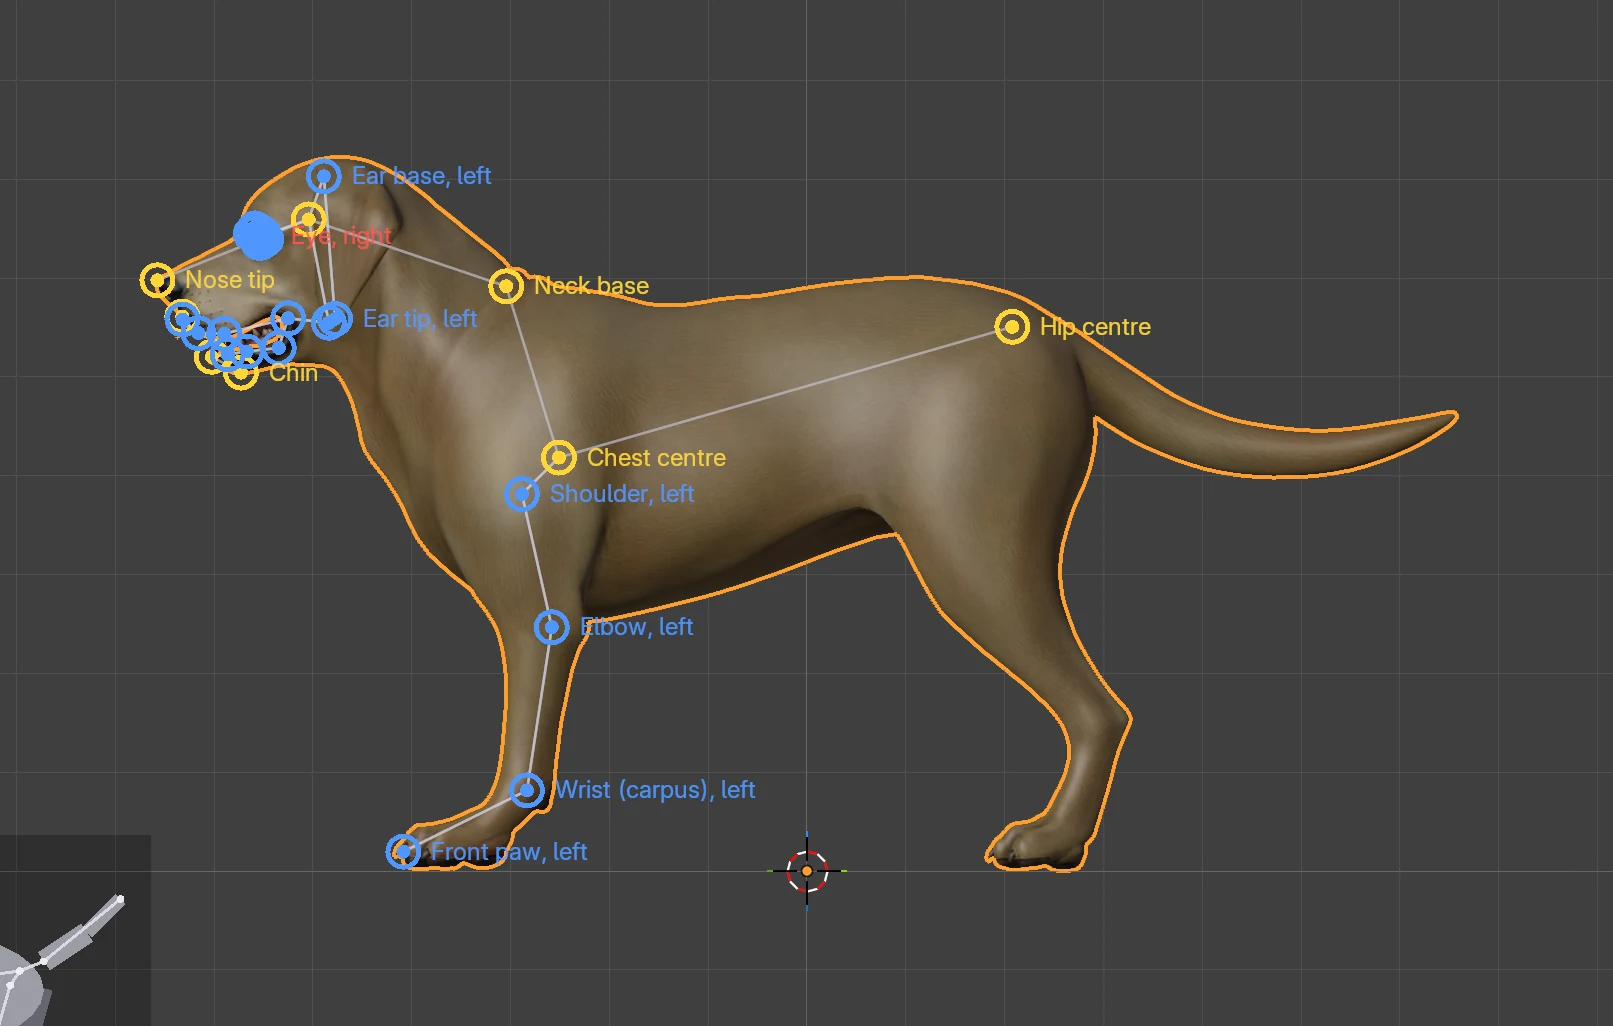
Press Click … on the animal, then click the joint in the viewport. In a straight side view you do not have to hit the mesh: click where the joint looks like it is. The add-on keeps your height and your front-to-back position and works out how deep inside the leg or body the joint sits.
The list moves on to the next joint by itself. Keep clicking.
In a free (tilted) view the click has to land on the animal. The card tells you which kind of view you are in.
Face joints are different: they sit on the skin, so click the part itself, from any angle. See Face.
The tail tip and tail points are different too: click on the tail itself, from any angle, and the dot goes in the middle of the tail.
The order
The list runs head to tail: head and spine, then the tail, the front legs, the dewclaws, the hind legs and the face.
Legs are marked from the ground up: paw, wrist, elbow, shoulder. The top of a leg is hidden inside the body, and the add-on finds its depth from the joint below it, so the lower joint has to be there first. A row that has to wait says so, for example (after the elbow).
Every joint lists each one and where it goes.
The tail
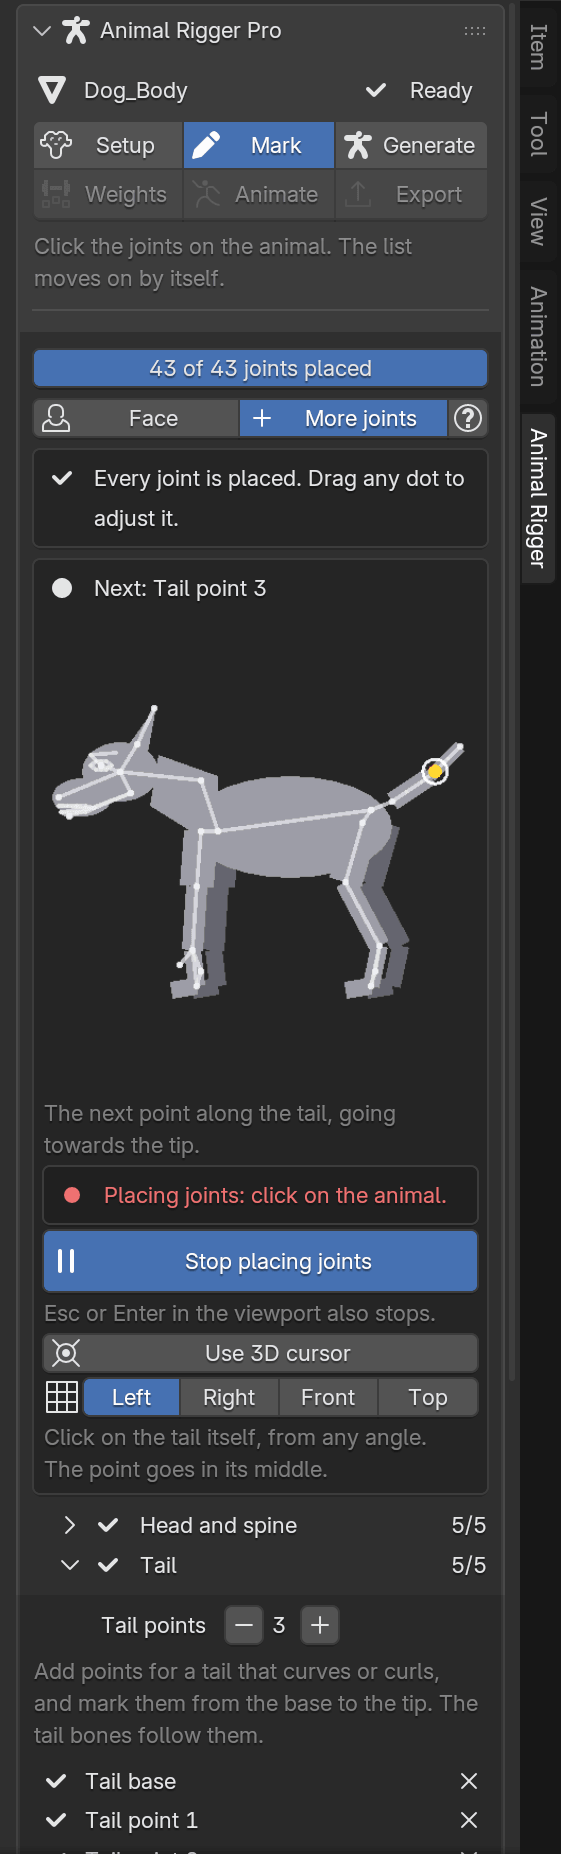
The tail is under More joints. Mark Tail base where the tail leaves the body and Tail tip at its very end. With only those two, the tail's bones run in a straight line between them.
For a tail that sags, curves or curls, press + beside Tail points. Each press adds a row between the base and the tip, up to four. Mark them in order, from the base towards the tip. The tail's bones then follow the tail through every point. − takes the last point away again.
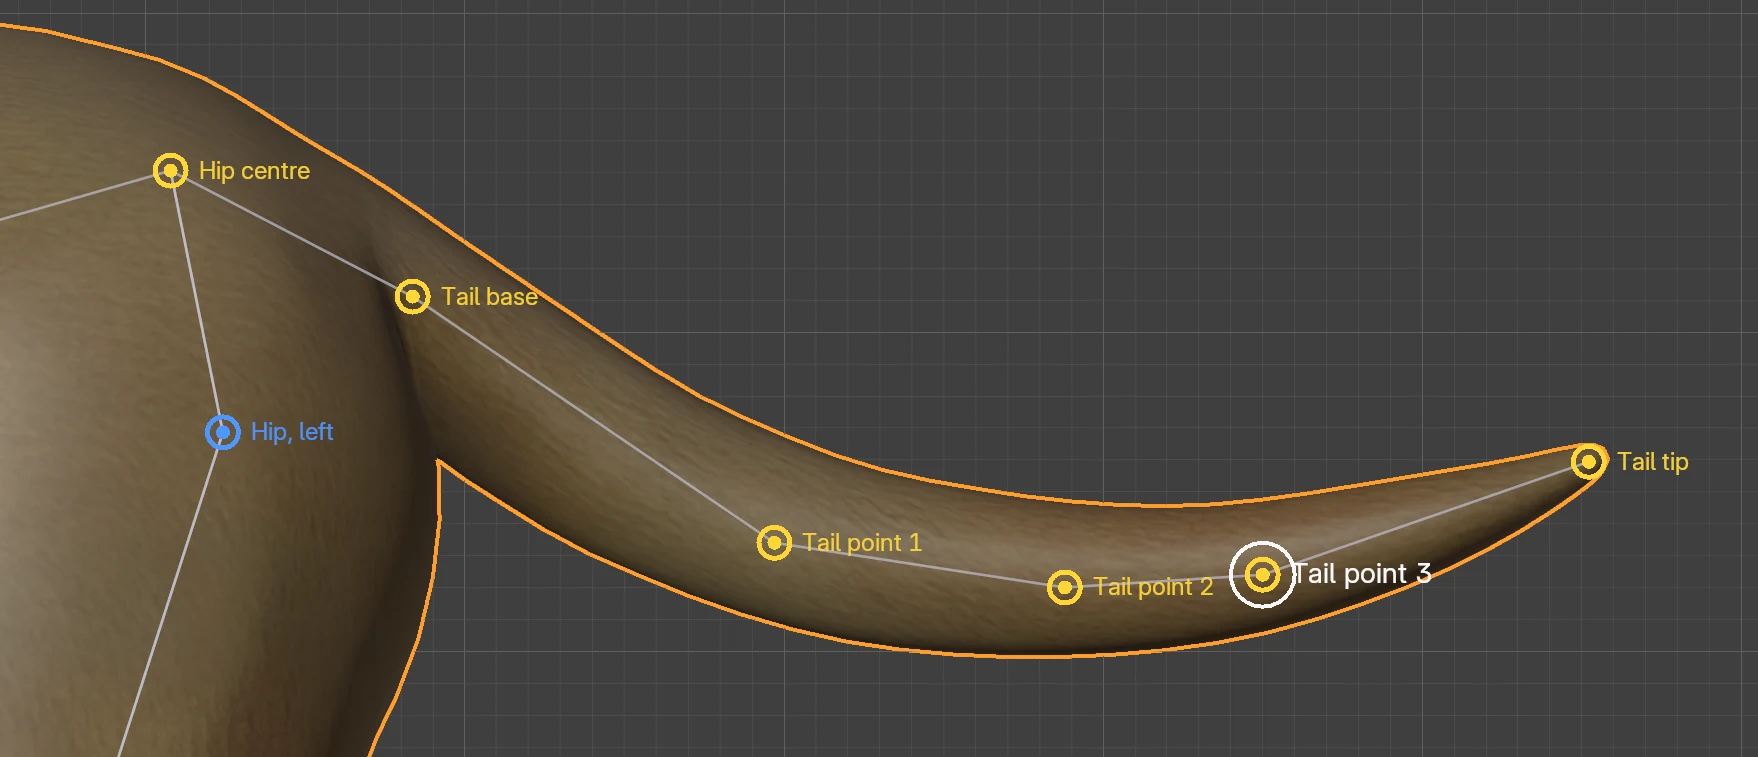
The dots above sit where the dog's tail really is. Without them, its bones would run straight from base to tip, well above the middle of the tail.
Both sides match
Each pair of legs has a Both sides match switch. While it is on, you mark the left side and the right side copies itself. Dragging either dot moves both.
Turn it off, so it reads Each side placed separately, for an animal that is not standing square, such as one caught mid-step. The add-on turns it off for you when the mesh check found the two sides in different places, and says why under the switch.
Guess the rest
Mark the nose, the hips, and both ends of a leg (the paw and the shoulder or hip). A Guess the other leg joints button appears. It fills in the knees, ankles, elbows and wrists from the species' usual proportions and checks each guess against the mesh.
A guess is a start. Drag any guessed dot and it becomes yours; guessing again will not move it.
Move, undo, stop
- Drag a dot in the viewport to move it. The ring under the mouse shows which dot you will grab.
- Backspace goes back one joint.
- CtrlZ undoes one placement at a time.
- Esc or Enter stops the click tool.
What the dots mean
Open What the dots mean at the bottom of the page for this list:
- Blue is the animal's left, red its right, yellow the middle line.
- A filled dot is one you placed. A hollow ring is a copy from the other side.
- The white circle is the joint being placed now.
When you are done
The banner says Every joint is placed. Missing joints the build needs are listed in red at the bottom. Press Next: generate the rig.
You can come back to Mark after building. The rig shows its rest shape while you edit; press Rebuild rig on Generate when you are done. See Rebuild.