 Animal Rigger Pro
Install
Put Animal Rigger Pro into Blender and find its tab.
What you need
- Blender 5.1 or newer. Version 0.1 was tested on Blender 5.2.2 LTS.
- macOS. Windows and Linux are expected to work but are not yet tested for 0.1.
- The add-on file,
animal_rigger_pro-0.1.0.zip. Keep it zipped.
The add-on needs no internet connection and installs no other programs.
Install the add-on
Open the extension settings
In Blender, open Edit › Preferences and pick Get Extensions on the left.
Install from disk
Click the small down-arrow at the top right of that page, then Install from Disk…. Pick animal_rigger_pro-0.1.0.zip.
You can also drag the zip file onto the Blender window.
Check it is on
Open Add-ons on the left. Animal Rigger Pro is in the list with its tick on.
Find the tab
In the 3D Viewport, press N to open the sidebar. Click the Animal Rigger tab on its right edge.
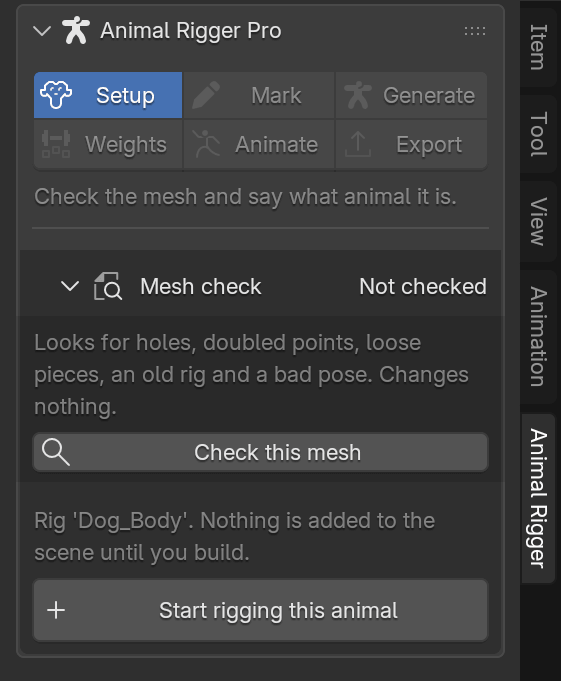
The six steps are always at the top. A step you cannot use yet is greyed out: Mark opens once you start an animal, and Weights, Animate and Export open once the rig is built.
Update to a new version
Install the new zip the same way. It replaces the old one. Rigs you already built keep working.
Remove it
In Edit › Preferences › Add-ons, open Animal Rigger Pro, click its down-arrow and pick Uninstall. Rigs you built stay in your files and still work, because they are plain Blender rigs.
Next: rig your first animal.